
Using Token2 Security keys for JumpCloud platform
The user interface (UI) provides a central hub for accessing IT resources needed for various tasks. This includes both on-premises devices and applications, such as laptops and wireless access points, as well as cloud-based services like software-as-a-service (SaaS) applications. Multi-Factor Authentication (MFA) with JumpCloud enhances security by securing user access to organizational resources.
JumpCloud supports several MFA methods, including Time-Based One-Time Password (TOTP) and WebAuthn. In this guide, we will outline the steps required to configure Token2 Security keys as a WebAuthn method for two-step verification. Please note that this method supports the following resources:
1)User Portal
2)SSO Applications
Requirements:
• An admin access to the JumpCloud console.• Admin access to enable security keys (not required if security keys are already enabled)
• Modern browser supporting security keys
• A Token2 FIDO security key
Enable an MFA method
1. Log in to the JumpCloud Admin Console at https://console.jumpcloud.com/login/admin.2. From your admin dashboard, scroll to Security Management in the left navigation bar and click on MFA Configurations.
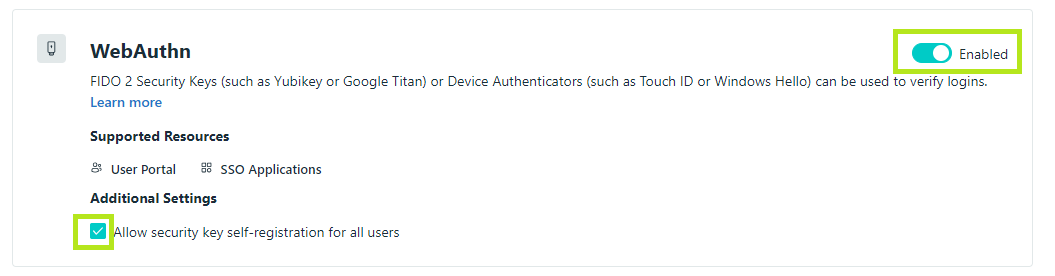
3. Toggle the switch to Enabled next to the WebAuthn method, as shown below. Additionally, check the option for Allow security key self-registration for all users.
Setting up a security key
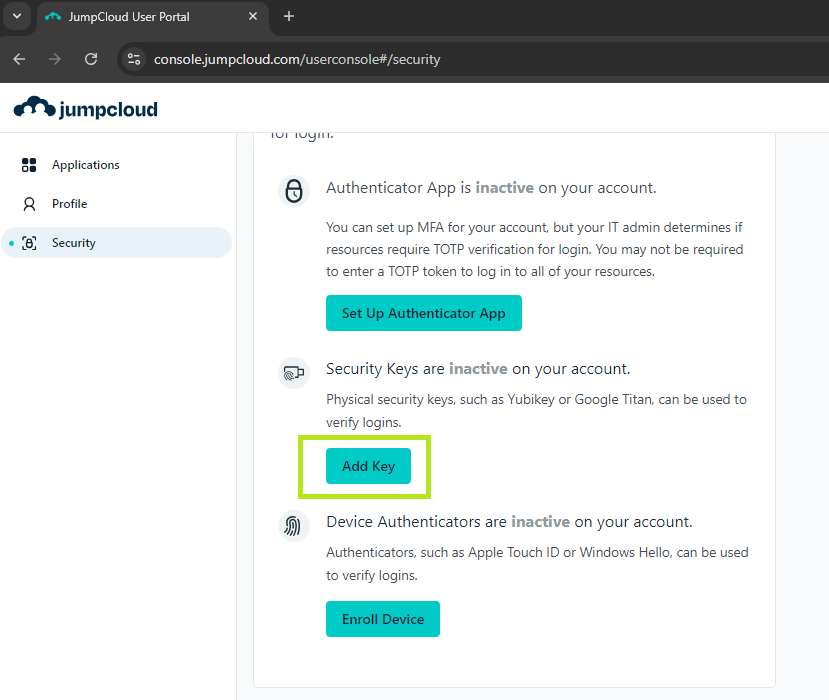
1. Log in to the JumpCloud User portal at https://console.jumpcloud.com/login.2. Click on Security in the left navigation bar, and then click Add Key in the right panel.
3. A popup window with the security key enrollment wizard will appear..
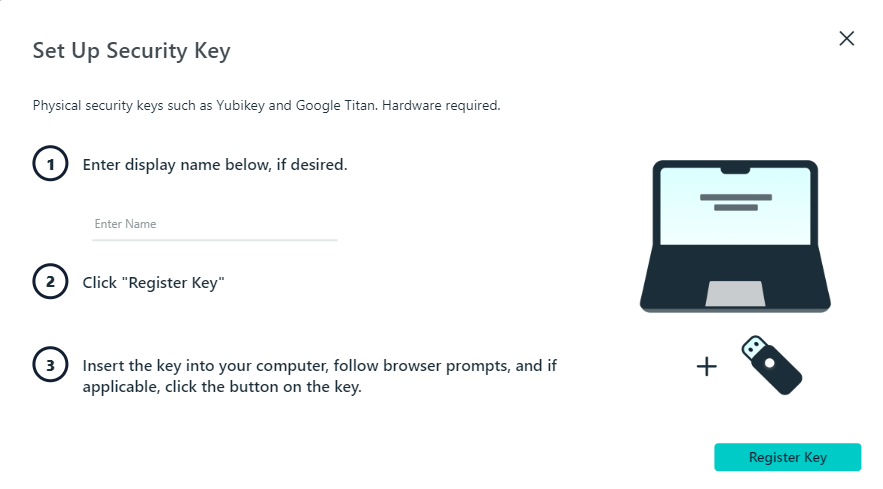
4.Enter a name for your security key and press the Register Key button.
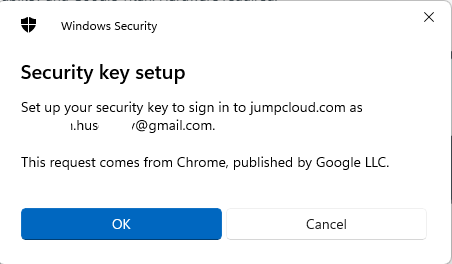
5. JumpCloud will begin identifying the security key. Insert the security key and press OK.
6.If you have set up a PIN code for the security key, you will be prompted to enter it.
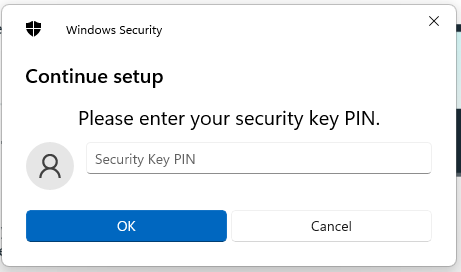
7. Then you will be prompted to press the button on the security key to complete registration.
Note: Security keys differ in the exact instructions to activate them. Your key may require a tap or button press to activate registration.
8. Click Done to complete the enrollment process.
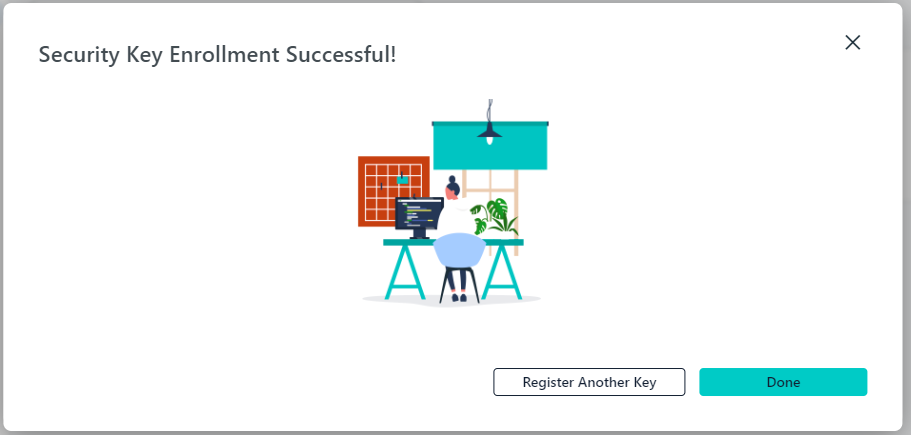
9. As a result, you will see information about the enrolled key.
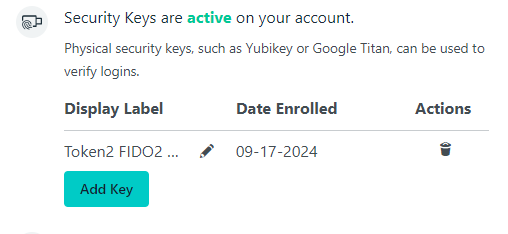
Your user account is now ready to use this identity verification method. When JumpCloud prompts you for your security key, insert it and touch the button to complete the verification.
Subscribe to our mailing list
Want to keep up-to-date with the latest Token2 news, projects and events? Join our mailing list!