Token2 NFC Burner app for Windows v 0.1
Windows application will require an external USB NFC reader (which will be available to be ordered on our online shop) or a built-in NFC module (existing on some models of modern laptops). So far the application has only been tested under Windows 10 and Windows 8 64 bit.
07-May-2020: v0.01F β - QR code scanning features added
02-Oct-2019: v0.1 of NFC Burner advanced version released
16-Jul-2019 : v0.0.1D - Azure CSV generation bugfixes
24-Apr-2019 : v0.0.1C - a fix to compensate DST time difference
27-Feb-2019 : v0.0.1B - MS Forms 2.0 references removed
26-Feb-2019 : v0.0.1B - adds empty chars to 16 char long seeds
31-Jan-2019 : v0.0.1 - first beta release
Download (zip archive file)
Download (zip archive file)
You should start by downloading the package and extracting to a folder on your hard drive. Token2 Burner app for Windows does not need to be installed, it can be launched as a standalone executable file.
Burning a seed
Follow the steps below to perform setting the seed for your token.
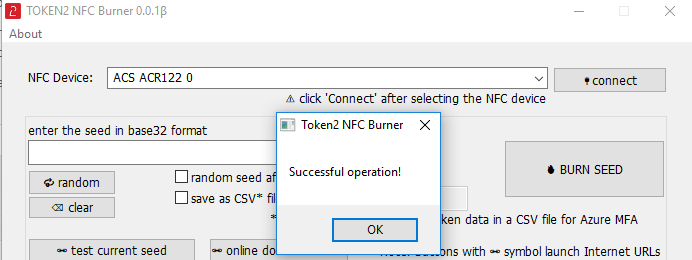
1. Launch the exe file, then select the NFC device from the drop-down list and click on "Connect". You should see a message box notifying about a successful operation.

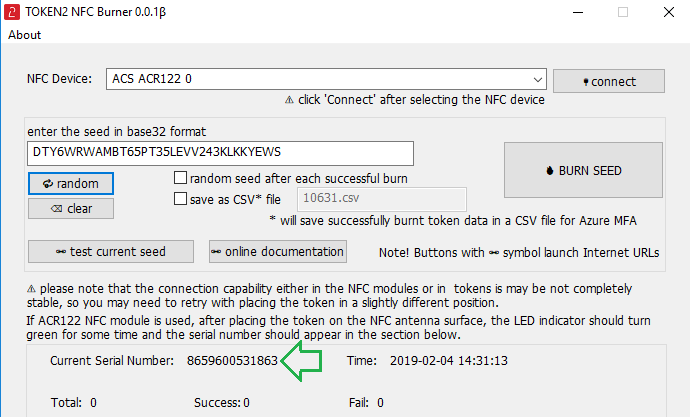
2. Enter the seed (in base32 format) or click on "random" button to generate a random seed.
3. Place the token onto the NFC module and wait for its serial number to appear.

3. Click on "Burn seed" button. A log entry with the serial number and "Successful operation" text will be logged in the log window.

QR Code operations
Starting from version 0.0.1F β, you can extract the base32 secrets from an image containing a QR code. You can scan the QR shown on the screen (the app will minimize itself, take a screenshot and then look for a QR code containing the TOTP seed) or decode from an image file. Only one QR code should be present at a time.

Syncing hardware clock
Follow the steps below to perform setting the time of the token. Please note that C300 model does not support this feature. Furthermore, the token models with "Restricted" time sync feature will have to be reseeded after this operation. Check the specifications of the token model before syncing the time.
1. Launch the exe file, then select the NFC device from the drop-down list and click on "Connect". You should see a message box notifying about a successful operation.

2. Place the token onto the NFC module and wait for its serial number to appear.

3. Set the time in the format as shown on the example below. You can use the current system time of the PC the burner application is running on by clicking on "current time" button. Click on "Set time" to start the process. "Time has been adjusted" message will be displayed upon successful operation.

Additional features
In addition to the two main functions described above, the application has the following features:
- Random seed generation: click on the "random" button to generate a random seed in base32 format in the seed text field
- Possibility to compare the OTP generated on the token with the OTP generated by our virtual token (requires internet access)
- Azure CSV file generation: if activated, each successfully burnt seed will be added to a CSV file in the format compatible with Azure Cloud MFA (you will only need to add the header row and modify the usernames)
- Token2 NFC Reader/Writer recommended
- ACR 122U
- HID Omnikey 5422
while we confirm the app will work with our tokens using the devices above, please be informed that some of these devices are manufactured by third parties and Token2 should not be held responsible for any defects or instability of these modules
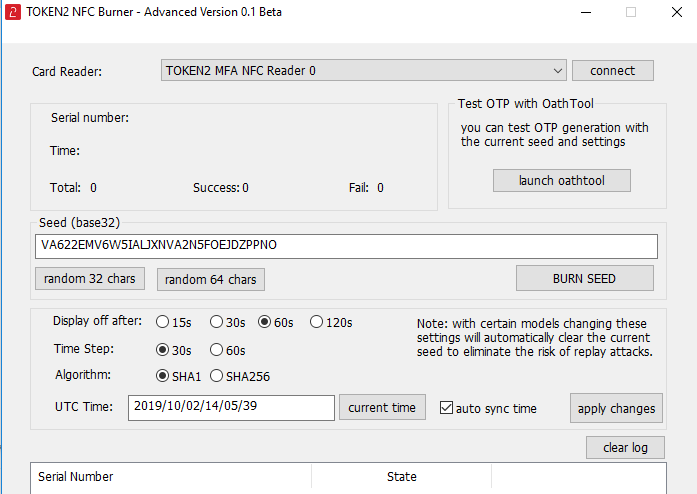
TOKEN2 NFC Burner - Advanced version

Download (zip archive file)
Subscribe to our mailing list
Want to keep up-to-date with the latest Token2 news, projects and events? Join our mailing list!
